
The following instructions demonstrate how to:
- Create an accounting file,
- Add an e-paymentaccount,
- Add the accounting file to the Property/Owner,
- Add the accounting file to PB Remote, and
- Map the PB transactions to your QB chart of accounts.
1. Create Accounting File
General Ledger > Create New Accounting File > Define accounting file > and click OK to save
2. Add an E-Payment Account
General Ledger > Select Accounting File > Edit Transaction Mapping > Click Actions > Set E-Payment Account >
Select account and click OK to save
If your e-payment account is not listed, please contact Trina Lasiter at trina.lasiter@propertyboss.com to create a new e-Payment account. See New Payment Account for additional information.
3. Add Accounting File to Property/Owner
Edit the Property > Select Accounting File and Transaction Mapping or Edit Owner
Click Statement tab > Select Accounting File and Transaction Mapping > Click OK to save
4. Add the Accounting File to PB Remote
IMPORTANT: QuickBooks company files (QBW files) MUST be stored on a lettered drive (ex: Q:, R:, S:) and MUST NOT be stored on the local C: drive.
- Open PB Remote
- Under “Setup Options,” click “Define Accounting Files”
- Type in the Accounting File Name and Prefix as they appear in PropertyBoss.
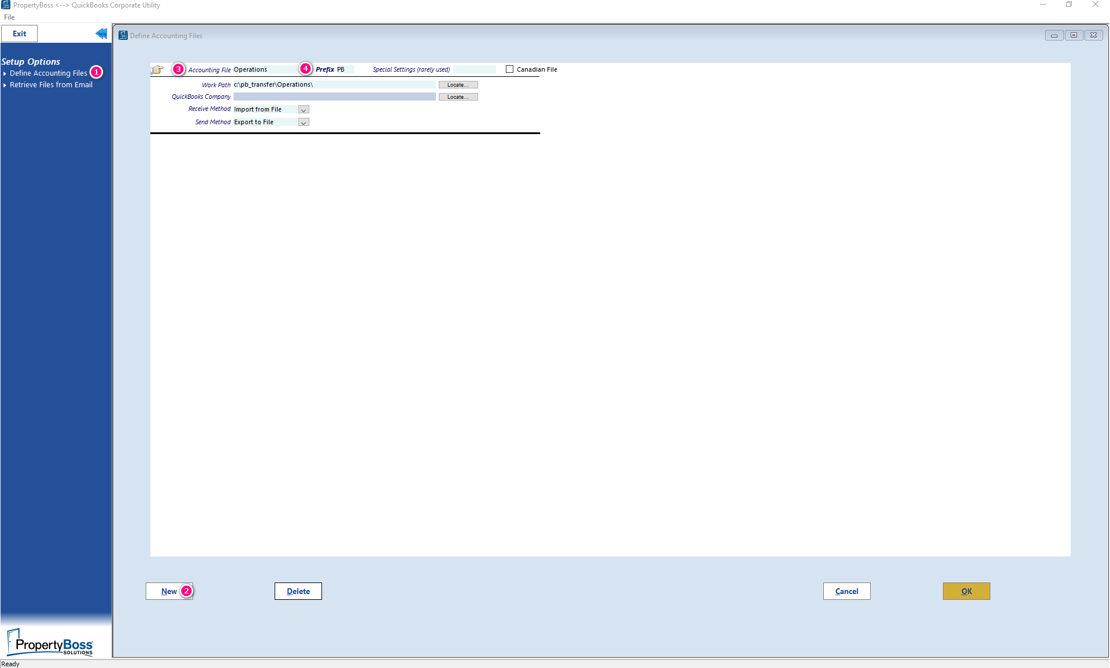
- The “Work Path” will default to creating a pb_transfer file folder on the User’s local C: drive. Update the Work Path accordingly.
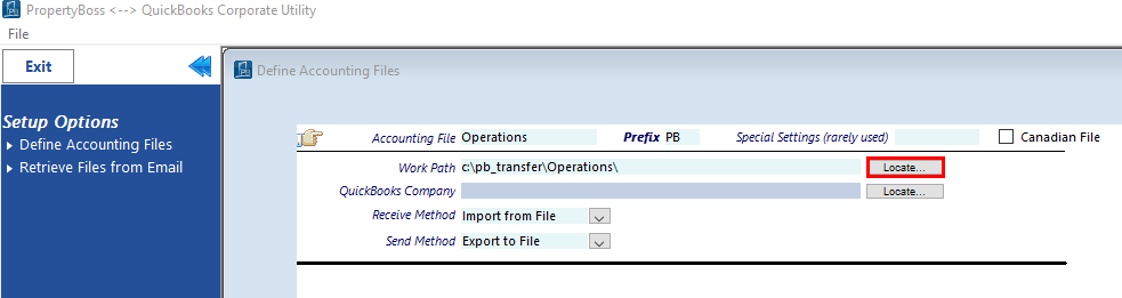
- Using the “Locate” button, navigate to the corresponding QuickBooks Company file save location.
- These files have a “green” icon and use a ".QBW" file extension.
- If you are unsure of the save location, you may open QuickBooks > click “File” > select “Open Previous Company” > note the pathway listed on the expanded window.
- Once noted, you MUST close QB before resuming setup.
- Received Method is “Import from File”
- Send Method is “Export to File”
- Click “OK” to save the accounting file setup.
- Log into the QuickBooks company file as the “Admin” user.
- Place the company file in Single-User mode.
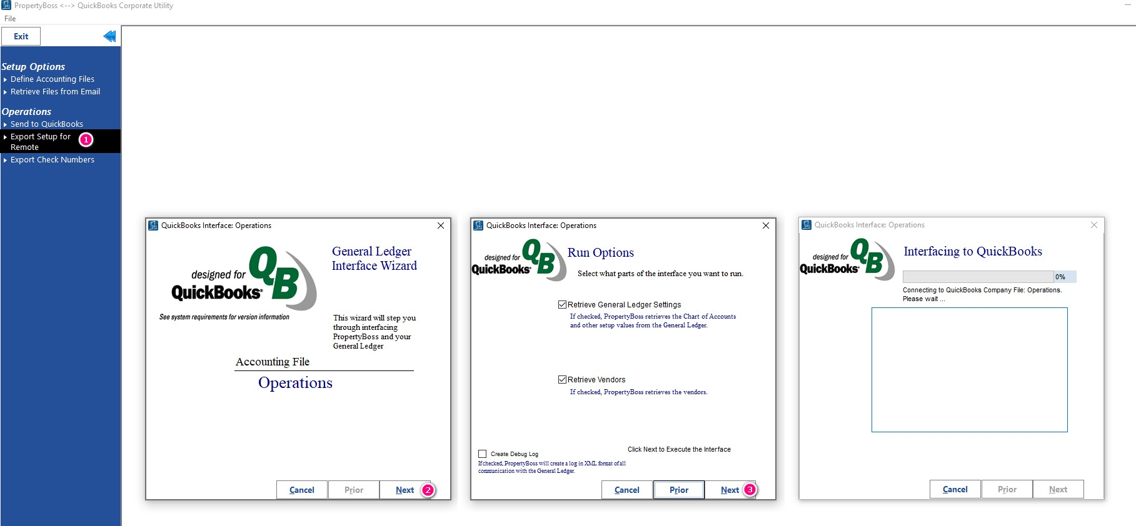
- In PB Remote, click “Export Setup for Remote” for the Accounting File. Follow the prompts.
- If PropertyBoss needs to be added as an authorized Third-Party Application, the QB software icon will blink/flash.
- Select the third option “Yes-whenever this QuickBooks company file is open”
- Go to General Ledger > Accounting File > Edit Accounting File
- On the “QuickBooks” tab, confirm QB file pathway matches pathway in PB Remote.
- In PropertyBoss, go to General Ledger > Accounting File > Click “Import from QuickBooks” > and follow the prompts
- Interface to QuickBooks
5. Transaction Mapping
General Ledger > Edit Transaction Mapping > assign your QuickBooks accounts to the PropertyBoss transactions