
This guide walks you through how to upload media using the Green C →  Upload Files workflow and then attach those files to units, leases, tenants, properties, or any area of the PropertyBoss system where media is supported.
PropertyBoss supports multi-file uploads, allowing you to upload multiple files at one time for a more efficient workflow.
File Size Restrictions
- The maximum file size allowed is 20MB per file
- If a file exceeds 20MB, you will need to use a file compression tool before uploading it to PropertyBoss.
1. Accessing the Upload Tool
- Log into PropertyBoss as usual.
- Navigate to the Green C →
 Upload Files menu and right-click on the Green C
(This is located in your taskbar toolbox under the ^) - Select Upload Files from the menu.
- The PropertyBoss Online User Upload screen will appear.
- Click the plus (+) button to begin adding media.
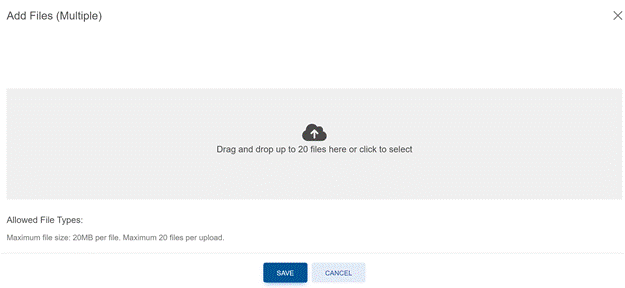
Drag & Drop
- A drag-and-drop area will appear for uploading your media.
- You can upload multiple files (20) at one time.
- Select or drag in as many files as needed, then click Save to upload.
Supported File Types
PropertyBoss supports common file formats, including:
- PDF documents
- Image files (JPG, JPEG, PNG, GIF)
- Microsoft Office files (Word, Excel)
- Text files and other standard document types
2. Attaching Uploaded Media in PropertyBoss
Once your media has been uploaded through the Green C tool, you can attach it to the appropriate record in the system.
- Navigate to the tenant, property, lease, or unit where the file needs to be attached.
- Open the Media tab.
- Select Add Media (green plus sign).
- Choose the correct directory, typically your Inbox folder.
Notes:
- If this is your first upload, you may be prompted to select the directory.
- PropertyBoss will remember your folder selection for future uploads.
- This is the folder where files uploaded through the Upload Files tool are stored.
3. Completing the Upload
Once you see your uploaded files listed:
- Select the media file(s) you want to attach.
- Check any relevant options (publish to portal, etc.).
- Click Save Media.
Best Practice: Managing Your Inbox
To keep your system clean and organized, it is recommended to use the Delete Source File after Processing option.
- This removes the file from your Inbox once it has been attached.
- The original file on your computer is not deleted.
How it works:
- Selecting Delete Source File after Processing is equivalent to cutting and pasting the file into its final location.
- Not selecting this option is equivalent to copying and pasting, leaving a duplicate file in the Inbox.
If this option is not selected, or if the same file needs to exist in multiple locations, manual cleanup of the Inbox will be required to prevent clutter.