
TABLE OF CONTENTS
- Before You Begin
- Create a New User
- Details: New User Welcome Email
- Assign Security Permissions
- New User Login Instructions
- Verify User Access
- Common Issues
- Administrator Checklist
- Next Steps
PropertyBoss Administrators create and manage user accounts for employees who need access to PropertyBoss. Follow the steps below to add a new user and provide them with login access.
Before You Begin
Before creating a new user account, ensure you have:
- Administrator permissions in PropertyBoss Online
- Administrator permissions in PropertyBoss (minimum: Maintain Security Settings)
- The user's full name
- A unique email address for the user
- An understanding of the permissions the user should have based on their job responsibilities
Create a New User
Log in to PropertyBoss Online using your administrator account.
Navigate to Administration.
Select User Management.
Click Add User.
Complete the required user information, including:
First Name
Last Name
Preferred Name
Email Address - Verify that the email address is unique and belongs to the user being added.
Phone Number
Assign administrator access, if needed.
Select the domain(s) for access.
Access - Allows the user to log in to the domain.
Default - Opens the domain upon log in. When multiple domains are available, the user can switch between domains after log in. When no default is checked, the user is asked which domain to open at login.
Review the information for accuracy.
Click Create.
After clicking Create, an email is sent to the user with login instructions.
The new user account will now be created.
Details: New User Welcome Email
portal@mailgun.propertyboss.net) with the subject line "PropertyBoss New User." Most users receive the email within approximately five minutes of clicking Create.If the user does not receive the email, have them:
- Check their Spam/Junk folder.
- Review any email filtering or security rules that may be blocking the message.
- Add
portal@mailgun.propertyboss.netto their safe sender list, if necessary.
Welcome Email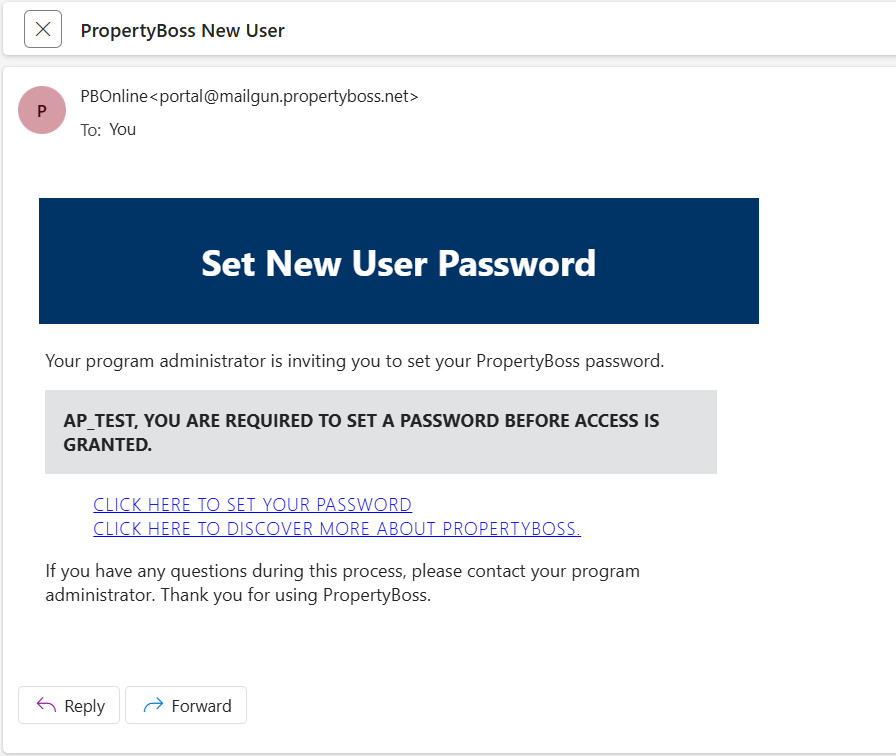
The Welcome Email contains two links:
- Click Here to Set Your Password - Selecting this link directs the user to the PropertyBoss password setup page, where they can create their password and activate their account.
- Click Here to Discover More About PropertyBoss - Selecting this link directs the user to the PropertyBoss Customer Resource Portal, where they can access training materials, knowledge base articles, and other helpful resources.
Assign Security Permissions
After creating the user account:
Launch PropertyBoss
Go to Setup Preferences > Security Settings > Create Users and Assign Security/Permissions
Select the user's name
Update the user's assigned security role.
All new users are assigned to the "new user" security role.
The permissions assigned to the "new user" security role cannot be modified.
The "new user" security role is restricted to logging into PropertyBoss only. Users assigned to this role will not be able to take any action or see content in PropertyBoss.
Grant access only to the modules and features required for the user's position.
Click OK to save permission settings.
Security Best Practices
- Create and assign security roles based on job responsibilities.
- Follow the principle of least privilege by providing users only the access necessary to perform their job duties.
New User Login Instructions
After the account has been created:
Instruct the user to watch for their welcome email.
The user should click the password setup link included in the email.
Once their password is created, they can log in to PropertyBoss Online.
New users must download the PropertyBoss RDP Client to launch PropertyBoss.
Log in to PropertyBoss Online.
Select the Support tab.
Download the PropertyBoss RDP Client for Windows.
Run the installer after the download is complete.
Follow the installation prompts to complete setup.
Verify User Access
After the user logs in for the first time:
Confirm they can successfully launch PropertyBoss.
Verify that they can access the menus and modules required for their role.
Make any necessary permission adjustments.
Common Issues
User Did Not Receive the Welcome Email
If the user does not receive their welcome email:
- Confirm the email address entered on the user account is correct.
- Ask the user to check their Junk or Spam folder.
- Verify that the user account was saved successfully.
Duplicate Email Address Error
If you receive a duplicate email address message:
- Verify that the email address is not already assigned to another user.
- Update one of the user records to use a unique email address.
- Save the changes and try again.
User Cannot Access Specific Areas
If the user can log in but cannot access certain functions:
- Review their assigned permissions.
- Compare their security settings to another user with similar responsibilities.
- Update permissions as needed and have the user sign out and back in.
Administrator Checklist
Before considering the setup complete, verify:
- User account has been created
- Email address is correct
- Security permissions have been assigned
- User received the welcome email
- User successfully created a password
- User can log in successfully
- User can access the appropriate PropertyBoss functions
Next Steps
Once the user has access, consider providing them with:
- The "How to: Login to PropertyBoss" guide
- Role-specific training materials
- Internal procedures and company policies related to PropertyBoss usage
- Information on who to contact if they encounter login or permission issues
This will help ensure new users can begin using PropertyBoss successfully from their first day.